Ganglia Yum 安装以及监控Hadoop 手记
最开始使用的源码安装,各种编译各种报错。然后发现epel中有yum源,于是就使用epel装了。下面是epel.repo的配置:
[epel]name=Extra Packages for Enterprise Linux 6 - $basearchbaseurl=http://download.fedoraproject.org/pub/epel/6/$basearch#mirrorlist=https://mirrors.fedoraproject.org/metalink?repo=epel-6&arch=$basearchfailovermethod=priorityenabled=1gpgcheck=1gpgkey=file:///etc/pki/rpm-gpg/RPM-GPG-KEY-EPEL-6[epel-debuginfo]name=Extra Packages for Enterprise Linux 6 - $basearch - Debugbaseurl=http://download.fedoraproject.org/pub/epel/6/$basearch/debug#mirrorlist=https://mirrors.fedoraproject.org/metalink?repo=epel-debug-6&arch=$basearchfailovermethod=priorityenabled=0gpgkey=file:///etc/pki/rpm-gpg/RPM-GPG-KEY-EPEL-6gpgcheck=1[epel-source]name=Extra Packages for Enterprise Linux 6 - $basearch - Sourcebaseurl=http://download.fedoraproject.org/pub/epel/6/SRPMS#mirrorlist=https://mirrors.fedoraproject.org/metalink?repo=epel-source-6&arch=$basearchfailovermethod=priorityenabled=0gpgkey=file:///etc/pki/rpm-gpg/RPM-GPG-KEY-EPEL-6gpgcheck=1
还用到了几个Centos6自带的rpm 包,下面这个是我本地的源,bill.repo配置如下,主要是Dvd1和Dvd2的包,其他的配置请忽略:
[centos6.6-d1]name=centos6.6-dvd1enabled=1baseurl=http://yum-bill/centos6.6/Packages/gpgcheck=0#baseurl=file:///mnt/centos6.6#baseurl=http://192.168.24.49/centos6.6/Packages#gpgcheck=1#gpgkey=file:///etc/pki/rpm-gpg/RPM-GPG-KEY-CentOS-6[centos6.6-d2]name=centos6.6-dvd2enabled=1gpgcheck=0baseurl=http://yum-bill/centos6.6/dvd2/Packages/[cloud]name=cloudstack4.5.1enabled=1gpgcheck=0baseurl=http://yum-bill/cloudstack4.5.1/[openvswitch]name=openvswitchenabled=1gpgcheck=0baseurl=http://yum-bill/openvswitch/[ceph6]name=ceph6enabled=1gpgcheck=0baseurl=http://yum-bill/ceph6/
安装
服务端:
下面的ganglia*包含了 :ganglia ganglia-gmetad ganglia-gmond ganglia-web
yum install rrdtool ganglia* pcre httpd php
客户端:
yum install ganglia-gmond
配置
服务端:
#1、gmetad.conf的配置vi /etc/ganglia/gmetad.conf#去掉各种注释之后如下:data_source "hadoop-cluster" v1:8649 # 只修改了这个集群名称和服务器主机和端口,后面的都是默认值。集群名称和主机后面的gmond.conf需要用到setuid_username gangliacase_sensitive_hostnames 0#2、gmond.conf的配置,下面只列出修改过了配置。没列出来的即代表使用默认值vi /etc/gmond.confcluster {name = "hadoop-cluster" # 这里和上面gmetad.conf 主机一致owner = "unspecified"latlong = "unspecified"url = "unspecified"}udp_send_channel {host = v1 // 使用host为单播,mcast_join为多播port = 8649ttl = 1}udp_recv_channel { // 如果使用单机广播,要删除“mcast_join”和“bind”#mcast_join = 239.2.11.71port = 8649#bind = 239.2.11.71retry_bind = true# Size of the UDP buffer. If you are handling lots of metrics you really# should bump it up to e.g. 10MB or even higher.# buffer = 10485760}#3、开机启动相关# 开机运行采集进程chkconfig --levels 235 gmond on# 开机运行数据存储进程chkconfig --levels 235 gmetad on# 开机运行apache服务chkconfig --levels 235 httpd on
客户端:
# 在server端执行scp,将配置文件分发到client端。我这里发到了v2,v3,v4。也就是算上v1一共有4台机器scp /etc/ganglia/gmond.conf {ip}:/etc/ganglia/gmond.conf# 设置开机运行数据采集进程chkconfig --levels 235 gmond on
运行
服务端:
service gmond startservice gmetad startservice httpd start
客户端:
service gmond start
测试
# 命令行打印当前活动clientgstat -a# web显示当前client状态http://{your_ip}/ganglia
Apache密码验证
通过web方式访问ganglia不需要密码,所以我们通过apache设置密码达到安全目的。
①htpasswd -c /etc/httpd/conf.d/passwords {your_name}②cd /usr/share/gangliavi .htaccess // 创建apache目录密码文件,并写入下面内容AuthType BasicAuthName "Restricted Files"AuthUserFile /etc/httpd/conf.d/passwordsRequire user {your_name} ③vi /etc/httpd/conf/httpd.conf <Directory /> Options FollowSymLinks AllowOverride None</Directory>修改为:<Directory /> Options FollowSymLinks AllowOverride AuthConfig</Directory>
如果这个时候访问:http://v1/ganglia还是报错的话 (403 ERROR ),修改以下文件配置:
vi /etc/httpd/conf.d/ganglia.conAlias /ganglia /usr/share/ganglia<Location /ganglia> Order deny,allow #Deny from all #将这行注释,写上下面那行 Allow from all Allow from 127.0.0.1 Allow from ::1 # Allow from .example.com</Location
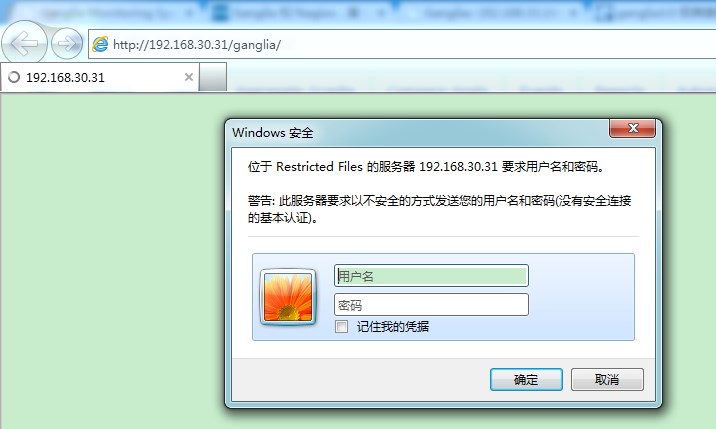
测试访问:
输入账号密码就可以了
 进来之后是这样的:
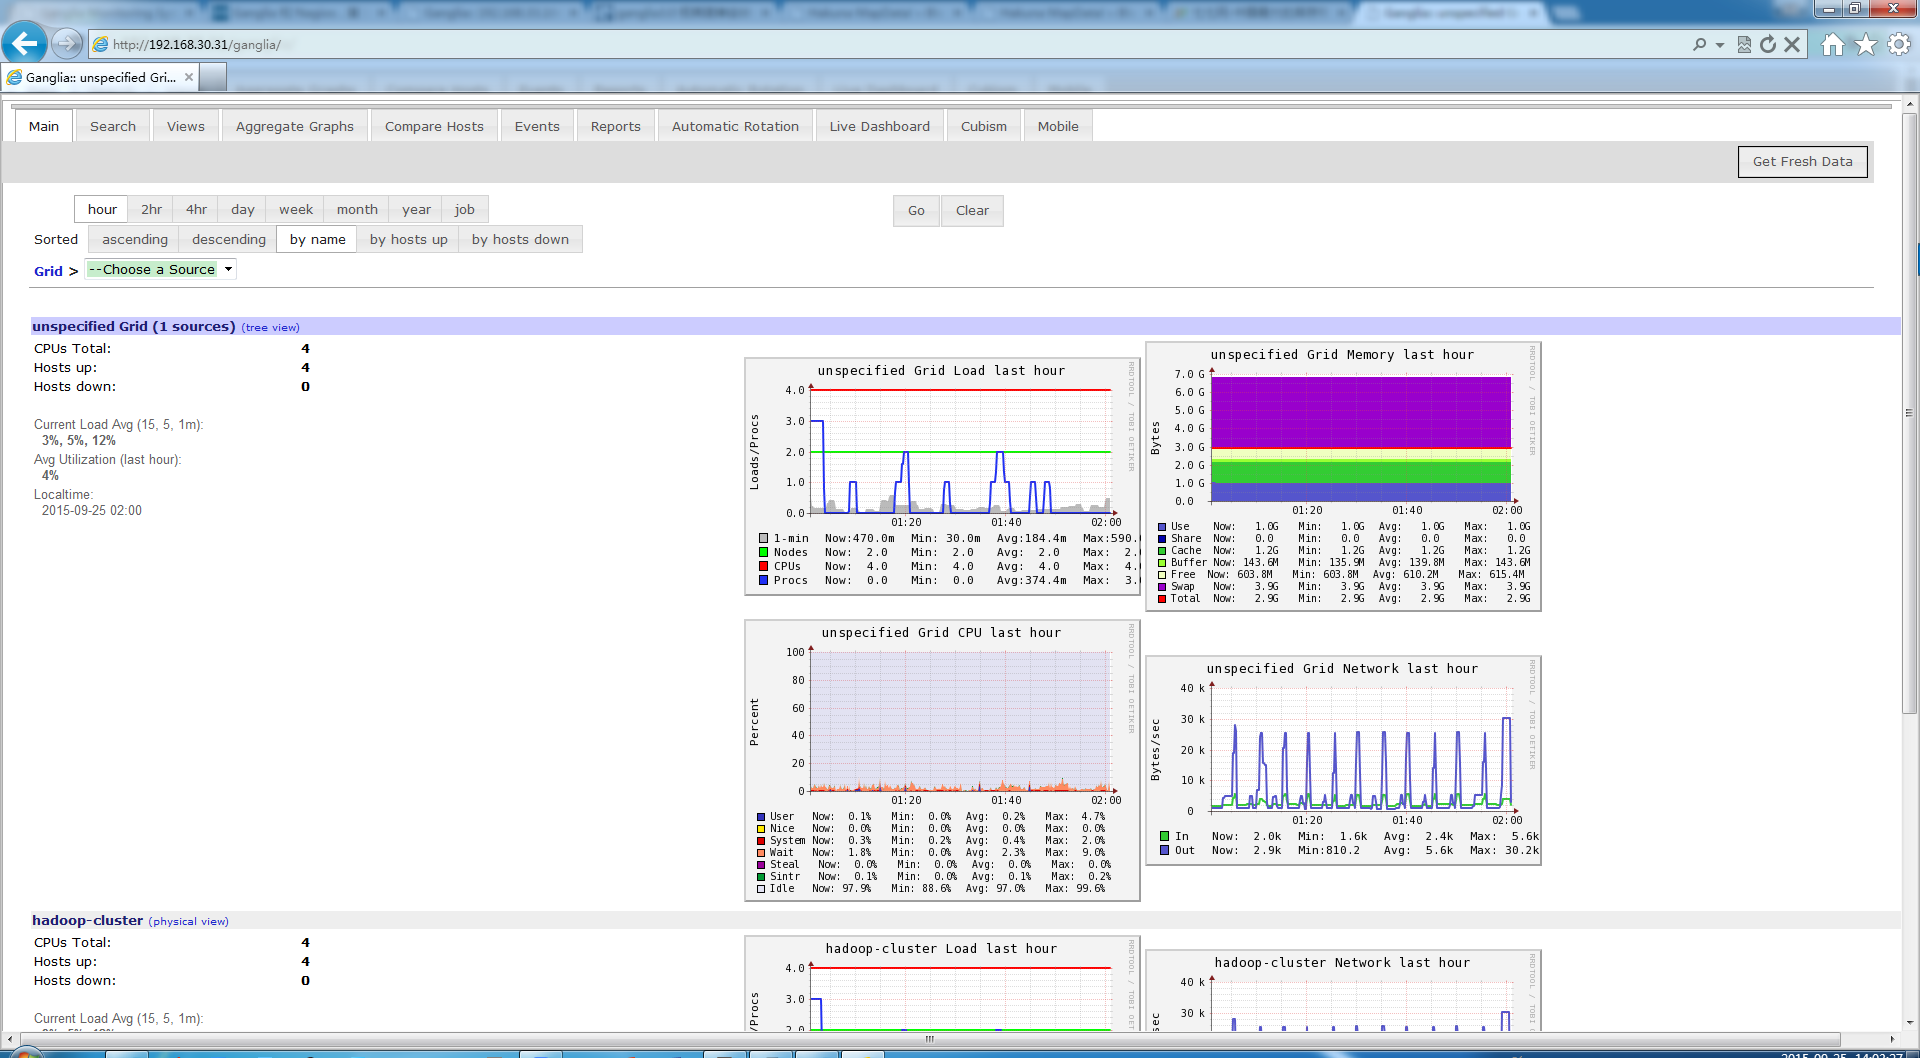 可以看到4个节点都能监控到了
 吸取个教训,以后但凡能通过yum装的,尽量用yum省时间。 安装篇差不多了,下面用它来监控Hadoop.
———————–—————––—————–—————–—————--Hadoop 监控分割线———————————–—————–—————–—————–
上面的监控是把4台机器都放到了一个组里面,和Hadoop并没有上面关系。下面要开始对Hadoop集群进行监控了,我目前4台机器搭建集群情况如下:
v1:Active Namenode/ResourceManager
v2:Standby Namenode/ResourceManager、DataNode
v3:DataNode
v4:DataNode
吸取个教训,以后但凡能通过yum装的,尽量用yum省时间。 安装篇差不多了,下面用它来监控Hadoop.
———————–—————––—————–—————–—————--Hadoop 监控分割线———————————–—————–—————–—————–
上面的监控是把4台机器都放到了一个组里面,和Hadoop并没有上面关系。下面要开始对Hadoop集群进行监控了,我目前4台机器搭建集群情况如下:
v1:Active Namenode/ResourceManager
v2:Standby Namenode/ResourceManager、DataNode
v3:DataNode
v4:DataNode
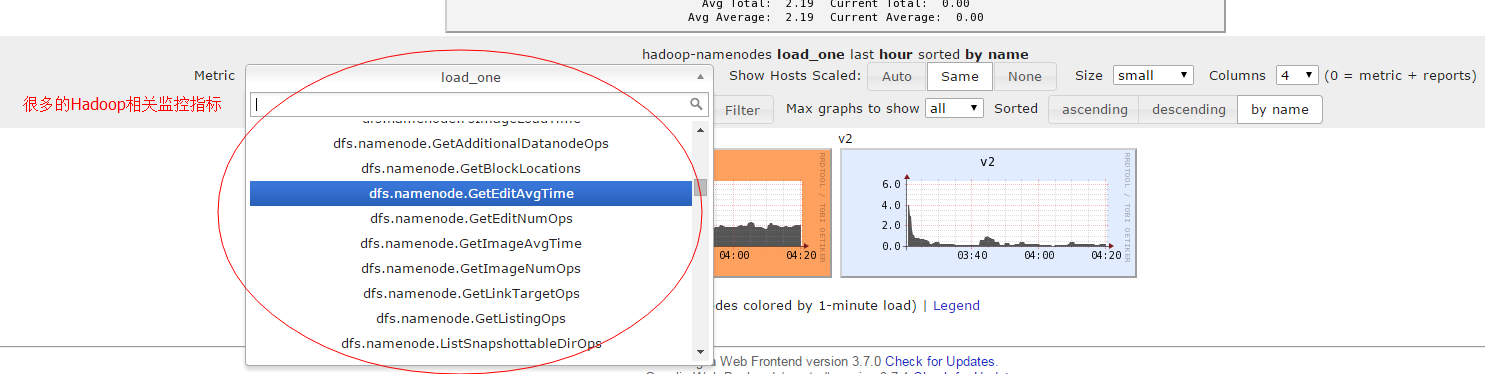
那么我这里会将原来的gmetad.conf和gmond.conf进行修改,同时还会修改Hadoop的hadoop-metrics2.properties的配置,这个文件修改后在Ganglia中可以看到很多Hadoop监控指标,超级爽!
修改如下配置:
1.v1上的gmetad.conf
原来的data_source只有一行,现在调整成两行,并且使用两个不同的端口,如下:
data_source "hadoop-namenodes" v1:8649 v2:8649data_source "hadoop-datanodes" v3:8650 v4:8650 #注意这里是8650,后面datanode上的gmond.conf要用setuid_username gangliacase_sensitive_hostnames 0
2.v1和v2的gmond.conf,这两个在这里我把它们当成hadoop-namenodes集群的配置
原来的gmond.conf就改个cluser-name就好啦,别的例如端口不需要改,还是用8649
/* * The cluster attributes specified will be used as part of the <CLUSTER> * tag that will wrap all hosts collected by this instance. */cluster { name = "hadoop-namenodes" #只需要修改这里 owner = "nobody" latlong = "unspecified" url = "unspecified"}/* The host section describes attributes of the host, like the location */host { location = "unspecified"}/* Feel free to specify as many udp_send_channels as you like. Gmond used to only support having a single channel */udp_send_channel { #bind_hostname = yes # Highly recommended, soon to be default. # This option tells gmond to use a source address # that resolves to the machine's hostname. Without # this, the metrics may appear to come from any # interface and the DNS names associated with # those IPs will be used to create the RRDs. #mcast_join = 239.2.11.71 host = v1 port = 8649 ttl = 1 }/* You can specify as many udp_recv_channels as you like as well. */udp_recv_channel { #mcast_join = 239.2.11.71 port = 8649 #bind = 239.2.11.71/* * The cluster attributes specified will be used as part of the <CLUSTER> * tag that will wrap all hosts collected by this instance. */cluster { name = "hadoop-namenodes" owner = "nobody" latlong = "unspecified" url = "unspecified"}/* The host section describes attributes of the host, like the location */host { location = "unspecified"}/* Feel free to specify as many udp_send_channels as you like. Gmond used to only support having a single channel */udp_send_channel { #bind_hostname = yes # Highly recommended, soon to be default. # This option tells gmond to use a source address # that resolves to the machine's hostname. Without # this, the metrics may appear to come from any # interface and the DNS names associated with # those IPs will be used to create the RRDs. #mcast_join = 239.2.11.71 host = v1 port = 8649 ttl = 1 }/* You can specify as many udp_recv_channels as you like as well. */udp_recv_channel { #mcast_join = 239.2.11.71 port = 8649 #bind = 239.2.11.71 retry_bind = true
3.修改v3和v4的gmond.conf,这里需要调整cluster-name和端口。将3个端口都改成8650同时把udp_send_channel-host修改成v3。当成hadoop-datanodes来配置
/* * The cluster attributes specified will be used as part of the <CLUSTER> * tag that will wrap all hosts collected by this instance. */cluster { name = "hadoop-datanodes" #修改名称 owner = "nobody" latlong = "unspecified" url = "unspecified"}/* The host section describes attributes of the host, like the location */host { location = "unspecified"}/* Feel free to specify as many udp_send_channels as you like. Gmond used to only support having a single channel */udp_send_channel { #bind_hostname = yes # Highly recommended, soon to be default. # This option tells gmond to use a source address # that resolves to the machine's hostname. Without # this, the metrics may appear to come from any # interface and the DNS names associated with # those IPs will be used to create the RRDs. #mcast_join = 239.2.11.71 host = v3 #修改 port = 8650 #修改 ttl = 1 }/* You can specify as many udp_recv_channels as you like as well. */udp_recv_channel { #mcast_join = 239.2.11.71 port = 8650 #修改 #bind = 239.2.11.71 retry_bind = true # Size of the UDP buffer. If you are handling lots of metrics you really # should bump it up to e.g. 10MB or even higher. # buffer = 10485760}/* You can specify as many tcp_accept_channels as you like to share an xml description of the state of the cluster */tcp_accept_channel { port = 8650 #修改 # If you want to gzip XML output gzip_output = no}
4.修改Hadoop的配置文件hadoop-metrics2.properties并且分发到另外3台机器,修改后的配置如下(这里只是把尾部的配置项目打开了,前面有些不相干的配置使用默认值):
## Below are for sending metrics to Ganglia## for Ganglia 3.0 support# *.sink.ganglia.class=org.apache.hadoop.metrics2.sink.ganglia.GangliaSink30## for Ganglia 3.1 support*.sink.ganglia.class=org.apache.hadoop.metrics2.sink.ganglia.GangliaSink31*.sink.ganglia.period=10# default for supportsparse is false*.sink.ganglia.supportsparse=true*.sink.ganglia.slope=jvm.metrics.gcCount=zero,jvm.metrics.memHeapUsedM=both*.sink.ganglia.dmax=jvm.metrics.threadsBlocked=70,jvm.metrics.memHeapUsedM=40# Tag values to use for the ganglia prefix. If not defined no tags are used.# If '*' all tags are used. If specifiying multiple tags separate them with # commas. Note that the last segment of the property name is the context name.##*.sink.ganglia.tagsForPrefix.jvm=ProcesName#*.sink.ganglia.tagsForPrefix.dfs=#*.sink.ganglia.tagsForPrefix.rpc=#*.sink.ganglia.tagsForPrefix.mapred=namenode.sink.ganglia.servers=v1:8649datanode.sink.ganglia.servers=v3:8650resourcemanager.sink.ganglia.servers=v1:8649nodemanager.sink.ganglia.servers=v3:8650mrappmaster.sink.ganglia.servers=v1:8649jobhistoryserver.sink.ganglia.servers=v1:8649
5.重启v1的gmetad和4台机器的gmond服务,然后重启整个Hadoop集群。
#v1上执行service gmetad restart#4台机器上都执行service gmond restart
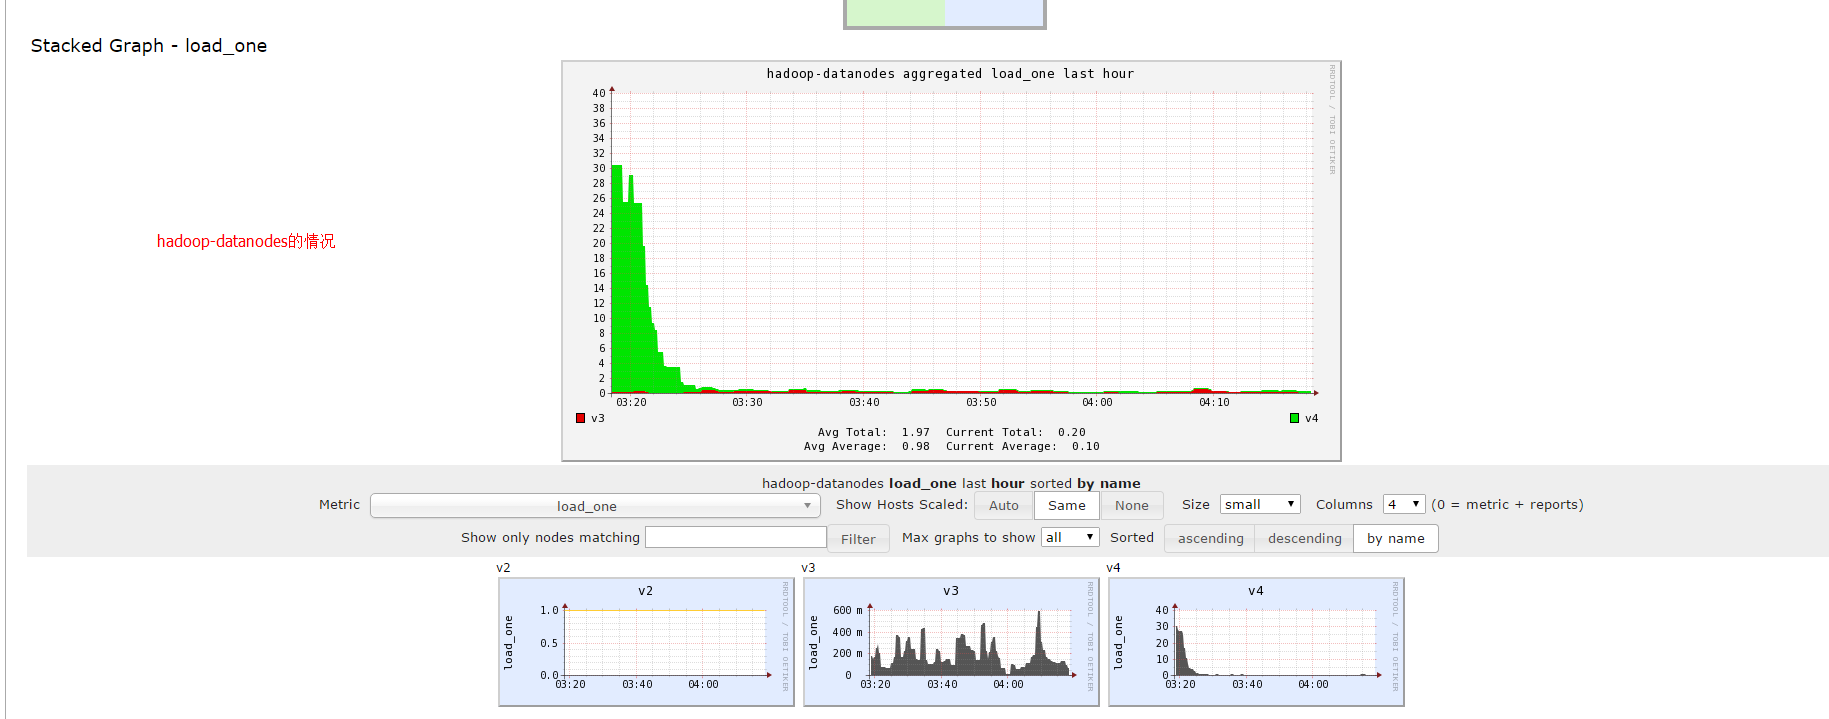
6.再次访问v1上的ganglia,就可以看到两个cluster了。并且有很多Hadoop监控的指标,很方便!
访问:192.168.30.31/ganglia,我这里用的v1的ip.
结果:
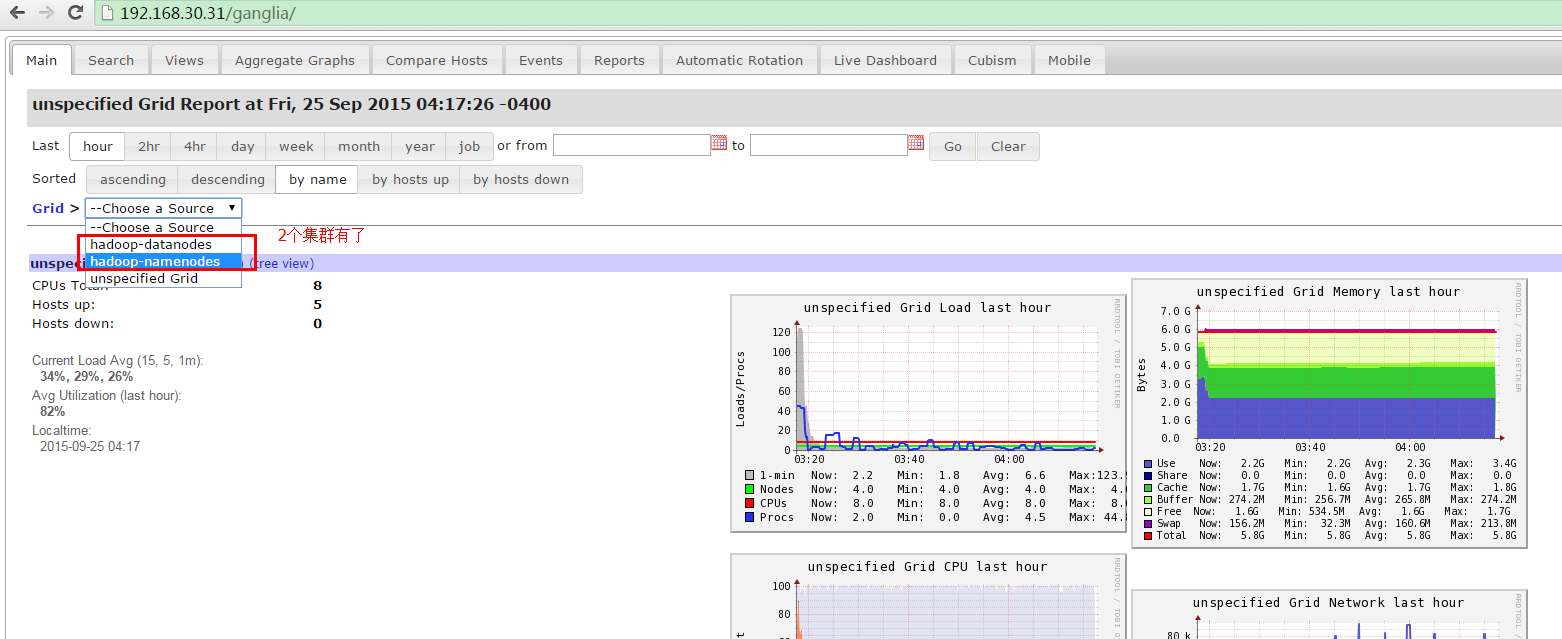
选中hadoop-datanodes后:
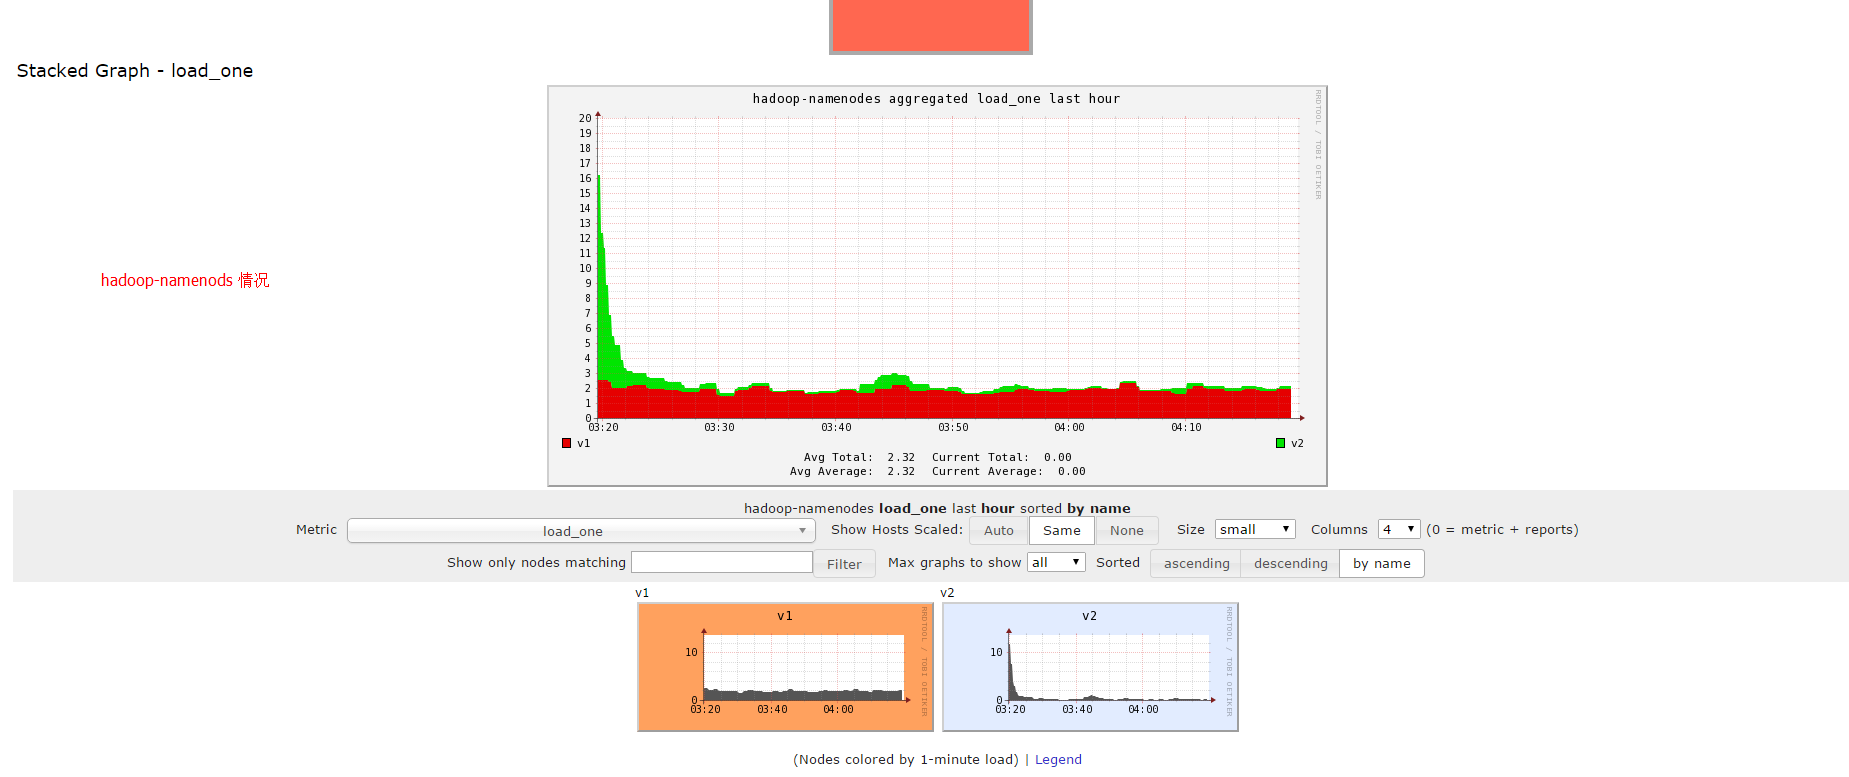
 选中hadoop-namenods后:
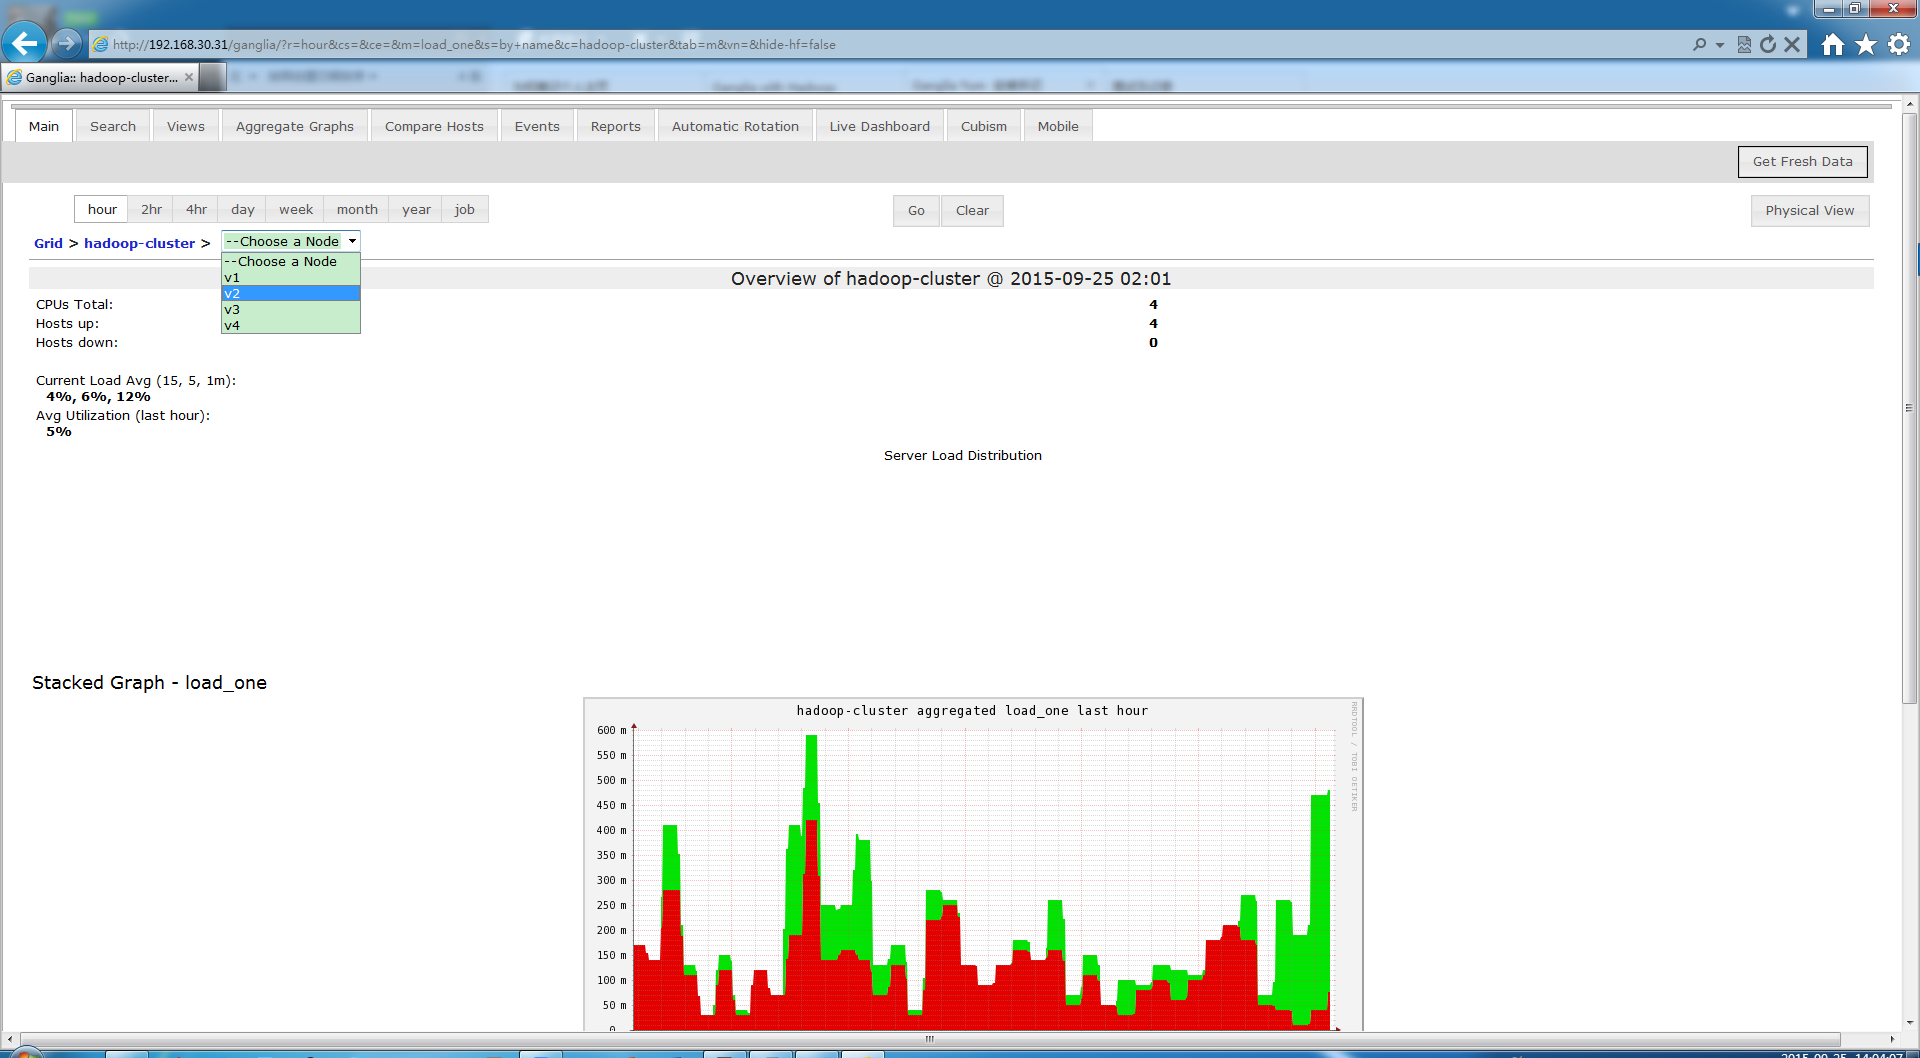
 查看hadoop的相关指标:
 好了,到这里就差不多了。 足够监控Hadoop集群使用了,下面研究下整合到Nagios实现报警。
service gmond startservice gmetad startservice httpd start
service gmond start
# 命令行打印当前活动clientgstat -a# web显示当前client状态http://{your_ip}/ganglia
Apache密码验证
①htpasswd -c /etc/httpd/conf.d/passwords {your_name}②cd /usr/share/gangliavi .htaccess // 创建apache目录密码文件,并写入下面内容AuthType BasicAuthName "Restricted Files"AuthUserFile /etc/httpd/conf.d/passwordsRequire user {your_name}③vi /etc/httpd/conf/httpd.conf<Directory />Options FollowSymLinksAllowOverride None</Directory>修改为:<Directory />Options FollowSymLinksAllowOverride AuthConfig</Directory>
如果这个时候访问:http://v1/ganglia还是报错的话 (403 ERROR ),修改以下文件配置:
vi /etc/httpd/conf.d/ganglia.conAlias /ganglia /usr/share/ganglia<Location /ganglia>Order deny,allow#Deny from all #将这行注释,写上下面那行Allow from allAllow from 127.0.0.1Allow from ::1# Allow from .example.com</Location
测试访问:
data_source "hadoop-namenodes" v1:8649 v2:8649data_source "hadoop-datanodes" v3:8650 v4:8650 #注意这里是8650,后面datanode上的gmond.conf要用setuid_username gangliacase_sensitive_hostnames 0
/** The cluster attributes specified will be used as part of the <CLUSTER>* tag that will wrap all hosts collected by this instance.*/cluster {name = "hadoop-namenodes" #只需要修改这里owner = "nobody"latlong = "unspecified"url = "unspecified"}/* The host section describes attributes of the host, like the location */host {location = "unspecified"}/* Feel free to specify as many udp_send_channels as you like. Gmondused to only support having a single channel */udp_send_channel {#bind_hostname = yes # Highly recommended, soon to be default.# This option tells gmond to use a source address# that resolves to the machine's hostname. Without# this, the metrics may appear to come from any# interface and the DNS names associated with# those IPs will be used to create the RRDs.#mcast_join = 239.2.11.71host = v1port = 8649ttl = 1}/* You can specify as many udp_recv_channels as you like as well. */udp_recv_channel {#mcast_join = 239.2.11.71port = 8649#bind = 239.2.11.71/** The cluster attributes specified will be used as part of the <CLUSTER>* tag that will wrap all hosts collected by this instance.*/cluster {name = "hadoop-namenodes"owner = "nobody"latlong = "unspecified"url = "unspecified"}/* The host section describes attributes of the host, like the location */host {location = "unspecified"}/* Feel free to specify as many udp_send_channels as you like. Gmondused to only support having a single channel */udp_send_channel {#bind_hostname = yes # Highly recommended, soon to be default.# This option tells gmond to use a source address# that resolves to the machine's hostname. Without# this, the metrics may appear to come from any# interface and the DNS names associated with# those IPs will be used to create the RRDs.#mcast_join = 239.2.11.71host = v1port = 8649ttl = 1}/* You can specify as many udp_recv_channels as you like as well. */udp_recv_channel {#mcast_join = 239.2.11.71port = 8649#bind = 239.2.11.71retry_bind = true
/** The cluster attributes specified will be used as part of the <CLUSTER>* tag that will wrap all hosts collected by this instance.*/cluster {name = "hadoop-datanodes" #修改名称owner = "nobody"latlong = "unspecified"url = "unspecified"}/* The host section describes attributes of the host, like the location */host {location = "unspecified"}/* Feel free to specify as many udp_send_channels as you like. Gmondused to only support having a single channel */udp_send_channel {#bind_hostname = yes # Highly recommended, soon to be default.# This option tells gmond to use a source address# that resolves to the machine's hostname. Without# this, the metrics may appear to come from any# interface and the DNS names associated with# those IPs will be used to create the RRDs.#mcast_join = 239.2.11.71host = v3 #修改port = 8650 #修改ttl = 1}/* You can specify as many udp_recv_channels as you like as well. */udp_recv_channel {#mcast_join = 239.2.11.71port = 8650 #修改#bind = 239.2.11.71retry_bind = true# Size of the UDP buffer. If you are handling lots of metrics you really# should bump it up to e.g. 10MB or even higher.# buffer = 10485760}/* You can specify as many tcp_accept_channels as you like to sharean xml description of the state of the cluster */tcp_accept_channel {port = 8650 #修改# If you want to gzip XML outputgzip_output = no}
4.修改Hadoop的配置文件hadoop-metrics2.properties并且分发到另外3台机器,修改后的配置如下(这里只是把尾部的配置项目打开了,前面有些不相干的配置使用默认值):
## Below are for sending metrics to Ganglia## for Ganglia 3.0 support# *.sink.ganglia.class=org.apache.hadoop.metrics2.sink.ganglia.GangliaSink30## for Ganglia 3.1 support*.sink.ganglia.class=org.apache.hadoop.metrics2.sink.ganglia.GangliaSink31*.sink.ganglia.period=10# default for supportsparse is false*.sink.ganglia.supportsparse=true*.sink.ganglia.slope=jvm.metrics.gcCount=zero,jvm.metrics.memHeapUsedM=both*.sink.ganglia.dmax=jvm.metrics.threadsBlocked=70,jvm.metrics.memHeapUsedM=40# Tag values to use for the ganglia prefix. If not defined no tags are used.# If '*' all tags are used. If specifiying multiple tags separate them with# commas. Note that the last segment of the property name is the context name.##*.sink.ganglia.tagsForPrefix.jvm=ProcesName#*.sink.ganglia.tagsForPrefix.dfs=#*.sink.ganglia.tagsForPrefix.rpc=#*.sink.ganglia.tagsForPrefix.mapred=namenode.sink.ganglia.servers=v1:8649datanode.sink.ganglia.servers=v3:8650resourcemanager.sink.ganglia.servers=v1:8649nodemanager.sink.ganglia.servers=v3:8650mrappmaster.sink.ganglia.servers=v1:8649jobhistoryserver.sink.ganglia.servers=v1:8649
5.重启v1的gmetad和4台机器的gmond服务,然后重启整个Hadoop集群。
#v1上执行service gmetad restart#4台机器上都执行service gmond restart